
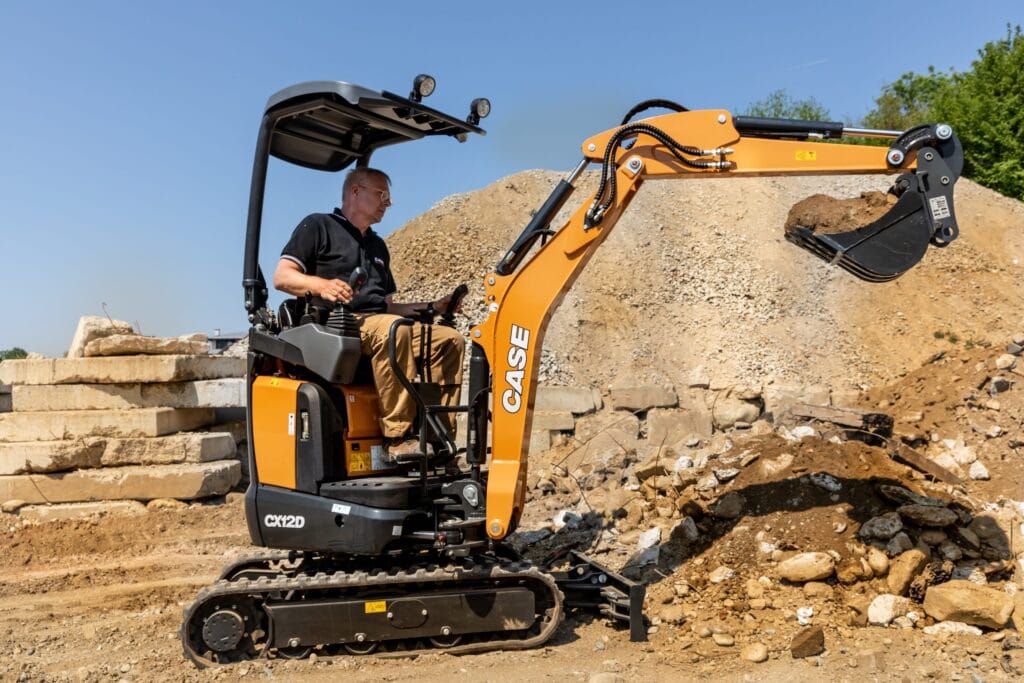
Mini excavators handle the same digging, lifting and grading work as a full-size excavator, but the job usually calls for one because of what a standard machine can’t do: fit through a side gate, work two metres from a fence, or turn without swinging a boom into a wall. Operating one well means understanding where that compact footprint changes the technique, not repeating the general excavator basics. Quotor’s mini excavator hire range covers the sizes discussed below.
Understanding Mini Excavator Controls
What Is a Mini Excavator?
In Quotor’s equipment taxonomy, mini excavators generally cover machines from about 1.7 to 9 tonnes, sitting above micro excavators and below the small excavator class, built on the same boom, stick, bucket and swing layout as larger machines but with a smaller operating footprint and, on most models, a front-mounted dozer blade. For the full definition and how mini excavators compare to standard-size machines, see what a mini excavator is.
Main Mini Excavator Controls
Mini excavators use the same basic boom, stick, bucket and swing functions as larger excavators, worked through two joysticks and a set of travel pedals or levers. The differences that matter come from the machine’s smaller footprint, lighter operating weight, dozer blade and the confined spaces it’s usually used in. For a full explanation of excavator control patterns and the basic digging cycle, see Quotor’s general excavator operating guide.
ISO vs SAE Control Patterns
Like larger excavators, mini excavators are set to either an ISO or SAE control pattern, and the two feel reversed on boom and stick until an operator is used to the switch. Check which pattern is set from the cab markings or operator’s manual; the guide linked above covers both patterns in full.
Dozer Blade Controls
The dozer blade has its own control for raising and lowering the blade, with the exact lever or pedal arrangement varying by model. The blade is used for backfilling and grading and can also contribute to machine stability when positioned correctly during digging, a technique covered further down.
Pre-Operation Mini Excavator Checks
Walk-Around Inspection
Walk the full perimeter before climbing in. Check the tracks for wear and correct tension, since a mini excavator’s narrower undercarriage is more sensitive to track damage. Check the bucket, blade and any attached hardware for cracked welds or loose pins, and confirm the ground around the machine and its swing radius is clear.
Fluids, Hydraulics and Undercarriage Checks
Check engine oil, coolant and hydraulic fluid against the sight gauges, and check fuel before starting rather than partway through the job. Inspect hydraulic hoses and cylinders for leaks, particularly around the blade cylinder, and grease the undercarriage and pivot points on the machine’s service schedule.
Boom, Arm, Bucket and Blade Checks
Cycle the boom, arm, bucket and blade through their full range with the machine stationary and clear of obstacles, watching and listening for anything that doesn’t move smoothly. Guides to excavator parts and attachment types cover what each component does and which attachments a mini excavator can run beyond the standard bucket.
Cab and Safety Checks
Adjust the seat and mirrors, confirm the safety lock lever disables the hydraulics when engaged, and check the seatbelt and rollover protection structure before starting the engine. Operating a mini excavator on a job site generally requires a licence; Quotor’s guide to becoming a licensed excavator operator covers the requirements.
How to Operate a Mini Excavator
Starting and Positioning the Machine
Start the engine with the safety lock lever engaged, then release it once you’re ready to move. Position the machine so the tracks are square to the work and the undercarriage has firm, level ground beneath it; a mini excavator’s lighter weight makes it quicker to tip than a standard machine if one side sits on soft or uneven ground.
Driving and Steering
Travel levers or pedals control each track independently: push both forward to drive straight, pull one back while pushing the other forward to pivot, and ease off one side to turn gradually. Keep the blade raised sufficiently for ground clearance while travelling, and account for it when crossing uneven ground or confined access points.
Operating the Boom, Arm and Bucket
Curl the bucket and raise the boom together to bring material up and back over the tracks, dump the load into the spoil pile or truck bed, then extend the arm and lower the boom to reset for the next pass. This cycle happens in a tighter arc on a mini excavator than on a standard machine, so smaller, more deliberate joystick movements give better control than the wider sweeps a larger excavator tolerates.
Swinging, Tail Clearance and Repositioning
Tail swing is the distance the counterweight travels beyond the tracks when the upper structure rotates, and it’s the clearance issue that most separates mini excavator operation from a standard machine. Conventional mini excavators still overhang the tracks on swing; zero-tail-swing and reduced-tail-swing models keep the counterweight within the track width, which is why they’re specified for work close to walls, fences or parked vehicles. Check which type you’re operating before swinging near anything you can’t afford to hit, and when repositioning in a confined area, swing clear before travelling rather than travelling into a space you then can’t turn out of.
Using the Dozer Blade
The blade does three jobs on a mini excavator: backfilling a trench, rough grading, and anchoring the machine. Lowering it against the ground before digging adds stability and stops the machine rocking on its tracks once the bucket is loaded, particularly useful on a lighter machine working near a slope or soft ground. Push material with the blade in short passes rather than moving a full trench’s spoil in one go, which overloads the blade and stalls the tracks.
Stopping and Parking Safely
Lower the bucket and blade fully to the ground, engage the safety lock lever, and apply the park brake before shutting down the engine. Park on level, stable ground clear of trenches and site traffic.
Mini Excavator Operating Techniques
Digging and Trenching
Position the machine so the excavation can be reached without unnecessarily working at maximum reach. Extending the working equipment further from the machine reduces the stability margin and can make precise bucket control more difficult. Bucket choice affects both speed and accuracy: Quotor’s guides to excavator bucket sizes and bucket types cover matching a bucket to trench width and soil type.
Grading and Backfilling
For grading, use the blade for the coarse levelling pass and the bucket for finer shaping, working high to low so material falls into low spots rather than being moved twice. Backfilling a trench is largely a blade job on a mini excavator: return spoil in controlled passes and use the bucket where finer material placement or shaping is required. Where specified compaction is required, use appropriate compaction equipment or an approved compaction attachment.
Working in Tight Spaces
A mini excavator’s main advantage is fitting into spaces a standard excavator can’t, so tight-space work is where most of its jobs happen. Plan the swing and travel path before starting: know where the counterweight will land on every rotation, keep the bucket low when travelling to preserve sightlines, and reposition often in small moves rather than reaching further than the machine comfortably allows.
Operating Near Walls, Fences and Obstacles
Working beside a wall, fence or structure means treating the tail swing radius as a hard boundary, not an estimate. Where clearance is tight, swing slowly and stop short of full rotation to check position rather than swinging to the stop. Gates and narrow access points are usually the tightest clearance the machine meets, so check the machine’s width against the opening and travel through slowly, using a spotter if visibility is limited.
Working on Slopes and Uneven Ground
Slope work reduces the stability margin of a mini excavator, particularly with a heavy attachment or loaded bucket extended away from the machine. Where slope work is unavoidable, stay within the manufacturer’s allowable limits, minimise boom reach and avoid working across a slope where the machine or site procedure prohibits it. Ground condition, track orientation and blade position should follow the machine manufacturer’s guidance for the task.
Building Mini Excavator Operating Skill
Common Operating Mistakes
The most common mistake is using the wrong size machine for the job: one too small struggles and stalls, while one too large can’t access the space it was hired for. Micro excavators under about 1.7 tonnes suit tight access such as a fenced yard or a doorway, while larger minis up to around 9 tonnes handle bigger trenching and grading jobs. Quotor’s guides to choosing the right excavator size and its range of standard excavators cover what to hire when a job outgrows a mini. Other frequent mistakes include over-reaching the arm on unstable ground, misjudging tail swing near obstacles, and skipping the walk-around inspection.
Improving Boom, Arm and Bucket Coordination
Coordination comes from practising the boom, arm and bucket together, not one function at a time. Run slow, deliberate cycles on open ground before attempting a precise trench line, then build speed once the movements are smooth.
Managing Tail Swing and Limited Clearance
Checking the swing path becomes automatic with repetition, done out of habit before every rotation near an obstacle rather than as a separate step. That habit is best built on a site with generous clearance before moving to confined work.
Improving Digging Accuracy and Cycle Efficiency
Accuracy improves by watching the bucket teeth rather than the whole machine. Cycle efficiency comes from minimising wasted movement and combining boom, arm and bucket motions instead of running them separately, a habit that matters more on a mini excavator, where a shorter reach makes small inefficiencies cost more repositioning.